


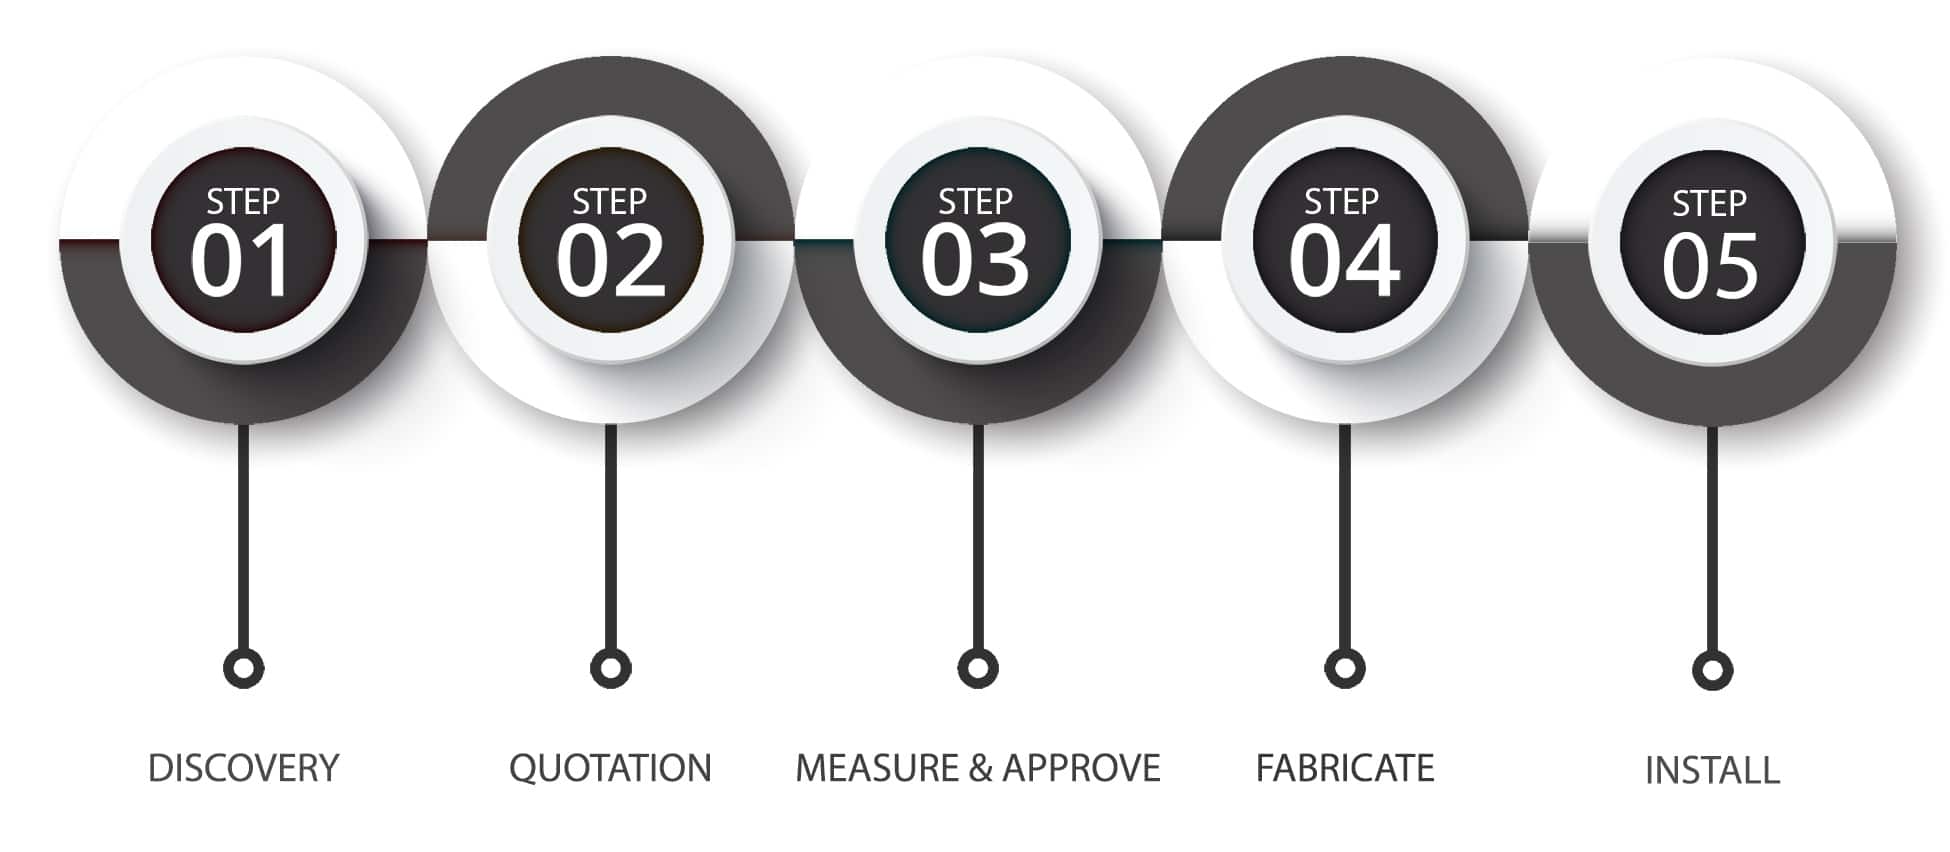
Our Process
Every project is unique: it’s one of the reasons we love working with natural stone. That’s why we take the time to work one-on-one with every customer to help you choose the right material for your lifestyle, and find just the right slab. When you purchase a Stone Interiors countertop, you can rest assured you’ll have the best in the industry at your side, overseeing every step of the process. We’ll make sure you get that perfect countertop, vanity or backsplash you’ve always envisioned.

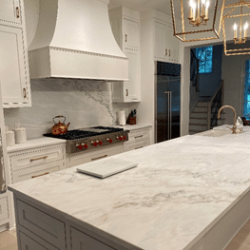
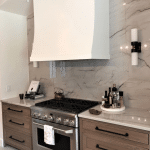
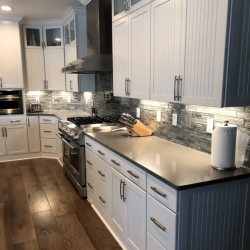
Stone countertops come in natural and man-made (engineered) materials. Natural materials include granite, marble, quartzite, and soapstone. Typical man-made or engineered materials include quartz, recycled glass, and ultra-compact surfaces.
Each type of material is excellent for its intended use as countertops. The differences among them often come down to buyer preference and perceived value. Factors that do influence the decision include how and where they will be used, preference for regular versus more random patterning, color choices, and cost.
Visualizers give you the opportunity to see your kitchen or bathroom design in a more realistic setting. You can select your preferred countertop colors and pair it with either matching or tile backsplash, then combine that with cabinet and flooring colors and styles to make your vision come alive.
We also have an edge profile visualizer that shows what the most common profiles look like on an actual countertop. We even have a countertop replacement visualizer that uses a photo of your very own room. That means you can see what a new color of material would look like with your cabinets, your wall color, your flooring, and more.
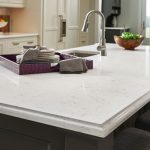
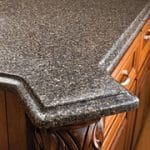
Common edge profiles for countertops are Eased, Bevel, Radius, Ogee, and Waterfall. Other profiles include Full or Half Bullnose, Double Radius, and Triple Pencil. Profile selection is largely a matter of personal preference, but factors like the overall size of the room, size of the countertop itself, and exposure to chipping also influence the decision.
Countertops typically overhang the cabinets by 1-1/2” to allow drawers to remain fully accessible when opened. Greater overhangs are often seen on islands, peninsulas, and raised bars to provide for seating. We follow industry safety guidelines that require overhang support for 3cm countertops with more than 10” overhang, and in no case should the cantilevered portion be more than one-third the total width of the countertop.
Backsplash may consist of the same color material as the tops themselves, in either a full-height configuration or (typically) a 4” rise from the countertops. Alternatively, we can install a tile backsplash which is available in various colors, patterns, and sizes.
Homeowners usually want to replace or upgrade their sinks and faucets when they get new countertops. You certainly don’t have to but when you’ve made a significant investment in countertops, you don’t want to diminish the look of it by re-using an old, scratched, dull sink or faucet. It’s also sometimes difficult to remove an existing sink without damaging it beyond the point of being able to re-use it.
We can provide almost any type and brand of sink and faucet through our network of distributors. You can also provide your own, but we need to know all of the details so we can fabricate the tops correctly. If you’re replacing a cooktop, we need to know its make and model as well.
Preliminary, or “rough” drawings provide a quick and easy way to estimate the square footage of the countertop area. These are useful when estimating the cost of replacing countertops and are literally a hand-drawn example of the existing layout with appropriate dimensions. Since countertops are priced and sold by the square foot, this enables us to quote a price for the installed material itself. We can measure this for you or you can do it yourself.
Measuring your own countertops is really pretty easy, requiring only that you be able to read a tape measure and perform basic math. We can talk you through it, or you can watch our video and do it on your own.
- Based on the preliminary drawings and specified options such as sinks, faucets, edge profile, backsplash, support bracing, sealer, etc., we will provide a detailed quotation for your project.
- Optional services such as tear out of existing countertops, plumbing disconnection and reconnection, and tile backsplash installation can also be included as separate line items in the quote.
- We can also include line items to quote the cost of the same options with different material types and colors.
- Be sure that a decision-maker, 18 yrs or older is on-site for the duration of the templating process.
- All items to be installed or mounted on or adjacent to the countertop must be on-site, including sinks, faucets, dispensers, appliances, etc.
- All countertops to be measured should be clear of all items to allow for accurate laser measurement.
- All cabinets must be permanently installed – which means they are structurally sound, plumb, level, and secured to the wall and/or floor.
- Farm-style or apron sinks must be installed in the cabinet.
- If your desired overhang requires support, and you elect to install your own bracing or corbels, they must be in place prior to measuring.
- Preferred seam placement should be discussed with the Measure Technician, but final placement is always at the discretion of the fabricator due to overall piece sizes and structural integrity.
- Once your project is ready to be measured, we will call to schedule the in-home templating process. Our Measure Technician will:
- Take photos of the project area
- Laser measure the cabinets or existing countertops
- Verify sinks/faucets/cooktops/appliances are in place, on-site, or we have specifications for them
- Verify faucet or other holes that may be required
- Verify that specified sinks and stoves fit in cabinets
- Verify that centerlines for sinks and cooktops are centered on cabinets
- Verify overhangs, raised bar specifications, and need for additional support
- Verify backsplash height
- Ask you to sign the final drawings

Preliminary, or “rough” drawings provide a quick and easy way to estimate the square footage of the countertop area. These are useful when estimating the cost of replacing countertops and are literally a hand-drawn example of the existing layout with appropriate dimensions. Since countertops are priced and sold by the square foot, this enables us to quote a price for the installed material itself. We can measure this for you or you can do it yourself.
Measuring your own countertops is really pretty easy, requiring only that you be able to read a tape measure and perform basic math. We can talk you through it, or you can watch our video and do it on your own.
- Based on the preliminary drawings and specified options such as sinks, faucets, edge profile, backsplash, support bracing, sealer, etc., we will provide a detailed quotation for your project.
- Optional services such as tearout of existing countertops, plumbing disconnection and reconnection, and tile backsplash installation can also be included as separate line items in the quote.
- We can also include line items to quote the cost of the same options with different material types and colors.
- Be sure that a decision maker, 18 yrs or older is on-site for the duration of the templating process.
- All items to be installed or mounted on or adjacent to the countertop must be on-site, including sinks, faucets, dispensers, appliances, etc.
- All countertops to be measured should be clear of all items to allow for an accurate laser measurement.
- All cabinets must be permanently installed – which means they are structurally sound, plumb, level and secured to the wall and/or floor.
- Farm-style or apron sinks must be installed in the cabinet.
- If your desired overhang requires support, and you elect to install your own bracing or corbels, they must be in place prior to measure.
- Preferred seam placement should be discussed with the Measure Technician, but final placement is always at the discretion of the fabricator due to overall piece sizes and structural integrity.
- Once your project is ready to be measured, we will call to schedule the in-home templating process. Our Measure Technician will:
- Take photos of the project area
- Laser measure the cabinets or existing countertops
- Verify sinks/faucets/cooktops/appliances are in place, on site, or we have specifications for them
- Verify faucet or other holes that may be required
- Verify that specified sinks and stove fit in cabinets
- Verify that centerlines for sinks and cooktops are centered on cabinets
- Verify overhangs, raised bar specifications and need for additional support
- Verify backsplash height
- Ask you to sign the final drawings

Our Measure Techs use the LT-2D3D Laser Templator, which increases the efficiency, accuracy, and speed of templating. The whole process typically takes less than 1 hour.
We will take photos of important areas of the project to assist when verifying details. We will laser measure to several points on the cabinets or existing countertops, mark centerlines for sinks and/or cooktops, and measure the stove opening. The drawings are literally created as the points are measured. Finally, we will ask you to review and sign the drawings.
- We know how difficult it can be to get a true sense of what a stone slab looks like when all you can see is a 4-inch sample. We want you to be completely happy with the material and color you choose.
- The stone you have selected is either a product of nature or made from natural materials and, as such, will have natural inconsistencies. Pits, fissures, and variations in color, pattern, texture, veining, and shade are common and normal. The performance of your countertop will not be affected by these characteristics.
- Stone Interiors offers our customers several options for viewing:
- We can send you a photo of the entire slab, but if your color has texture or pitting it may not be obvious
- We can do a video ‘walk through’ of the slab with you using phones, tablets, or computers
- You can personally see your slab at our facility and touch and feel the slab to be used
- We will schedule an appointment for you to see your slab at our distributor’s showrooms
We like to be sure that we have all of the details that will make your project go smoothly and ensure your complete satisfaction. We take the extra time to review the information that may have come to us at different times and from different sources, and make sure all of it is correct and complete. Sometimes that means a call or email to you to clarify a particular item, especially if your preference might have changed at some point in the process.
We have found that this final review before fabrication has caught missing or incorrect details that would potentially have delayed the project. This is the time to be safe and not sorry!
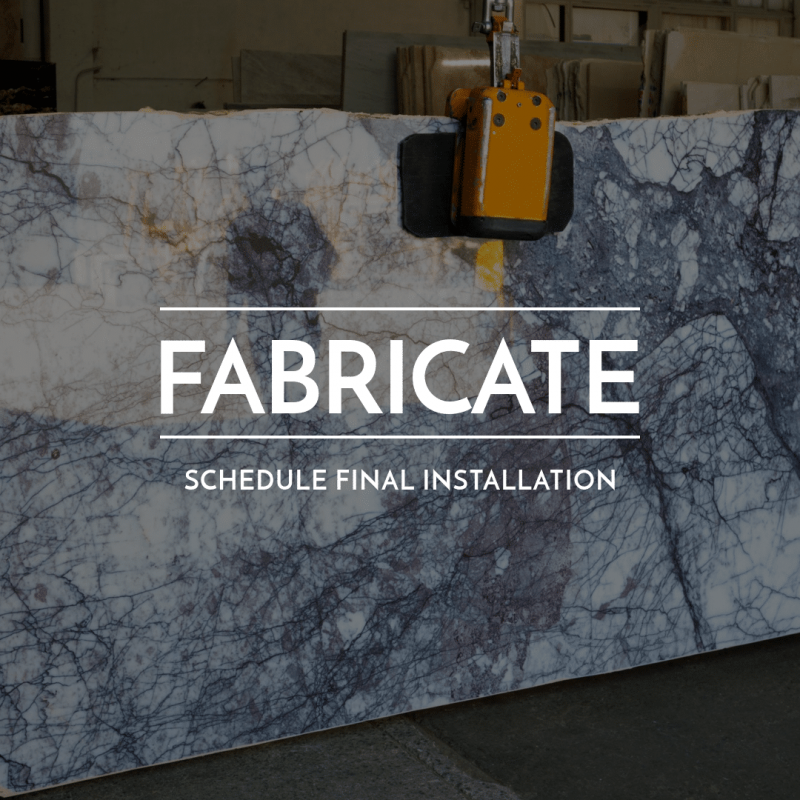
After reviewing all of the project details and ensuring everything is correct, we will call to schedule the earliest installation date and time available that fits your schedule.
Remember, it’s extremely important that a decision-maker, 18 years or older, is on-site for the duration of the install.
We place the slab(s) you selected onto our robotic sawjet cutting table. All of the countertop shapes to fit your cabinets are cut from those slabs. The tops are moved to the CNC router, which cuts the edge profile on all exposed sides of the tops.
The machinery we use to cut and rout is programmed using the dimensions created from the laser measure process. This gives us the ability to maintain precise tolerances from the measurements taken.
Our skilled fabricators inspect each piece coming off of the CNC router. They use a seven-step process and diamond polishing pads to hand polish edges and corners that may not have a perfect finish from the machinery. The tops of the pieces have been polished at the quarry, which means we seldom need to address that surface.
This is the time when you need to review the preparation for installation guidance, such as:
- Adult, decision-maker over 18 needs to be on-site for the duration of the install
- Cabinets are level and plumb
- Plan to turn off Central A/C or heat, as dust is likely to be created during installation
- Base cabinets should be completely emptied
- Plumbing and/or electrical connections need to be disconnected prior to tear out
- Plumbing and electrical need to be reconnected following install (24 hrs or more for plumbing) – schedule a professional or plan to do it yourself
After reviewing all of the project details and ensuring everything is correct, we will call to schedule the earliest installation date and time available that fits your schedule.
Remember, it’s extremely important that a decision-maker, 18 years or older, is on-site for the duration of the install.
We place the slab(s) you selected onto our robotic sawjet cutting table. All of the countertop shapes to fit your cabinets are cut from those slabs. The tops are moved to the CNC router, which cuts the edge profile on all exposed sides of the tops.
The machinery we use to cut and rout, is programmed using the dimensions created from the laser measure process. This gives us the ability to maintain precise tolerances from the measurements taken.
Our skilled fabricators inspect each piece coming off of the CNC router. They use a seven-step process and diamond polishing pads to hand polish edges and corners that may not have a perfect finish from the machinery. The tops of the pieces have been polished at the quarry, which means we seldom need to address that surface.
This is the time when you need to review the preparation for installation guidance, such as:
- Adult, decision-maker over 18 needs to be on-site for the duration of the install
- Cabinets are level and plumb
- Plan to turn off Central A/C or heat, as dust is likely to be created during installation
- Base cabinets should be completely emptied
- Plumbing and/or electrical connections need to be disconnected prior to tear out
- Plumbing and electrical need to be reconnected following install (24 hrs or more for plumbing) – schedule a professional or plan to do it yourself
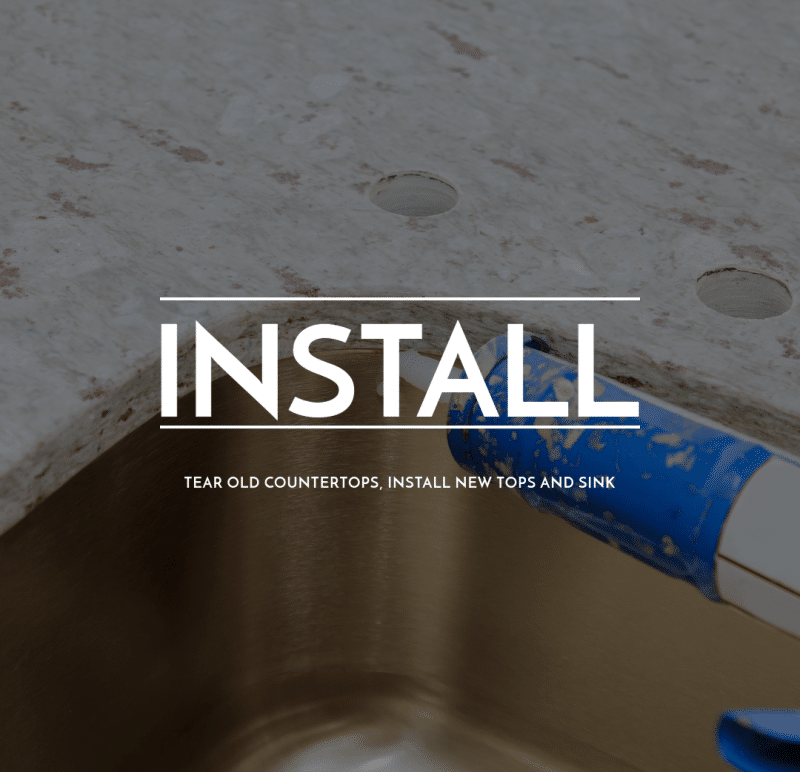
If you are replacing countertops on existing cabinets, those old tops need to be removed in order for new ones to be installed. You can engage us to remove them, remove them yourself, or hire someone to remove them.
If we remove the tops, our installation crew will remove the tops immediately prior to installation. We will also haul away those tops and any debris that goes along with them.
This is the end product of all we’ve done. Our installers will call you approximately 30 minutes prior to arriving. They will confer with you as to the best path from their truck to the project site as well as define an area in which they can set up a temporary worksite.
Once they begin installing they will shim any tops as needed to ensure they are flat, set and secure the sinks in place, drill faucet and switch holes, and set seams. They will also install any stone backsplash and caulk from stone to stone.
Before gathering up their tools and leaving, they will clean and visually inspect all countertops, verify that the sinks are water-tight, cabinet drawers are replaced, trash is removed and the area is swept. At this point, we also ask you to visually inspect the tops, edges, seams, and holes to make sure you are completely satisfied.
Protection: Some stone types should be sealed upon installation. Ask your fabricator about the porosity of your stone, and what type of sealer (if any) they typically recommend. Engineered materials may not require a sealer at all.
Maintenance: Do some research, and find out what types of cleaning solutions are recommended for your specific stone. And as always, partner with your fabricator to fully understand how susceptible your particular stone is to staining, as not all granites or marbles behave in exactly the same way. With any stone, it’s essential to clean up spills quickly to avoid the risk of staining.
Repairs: Even with the best care, chips, and stains do happen. If basic cleaning doesn’t resolve the issue, contact a trusted stone fabricator to take a look at the blemish. Any qualified stone professional will be able to advise you on how the issue should be repaired.
Take a look at our guidelines below for detailed care and maintenance of specific stone types.
VIRTUAL CONCIERGE
Begin creating your dreams project with our experienced stone specialists


